Thursday, January 9, 2014

Kitchen Cabinet Refinishing

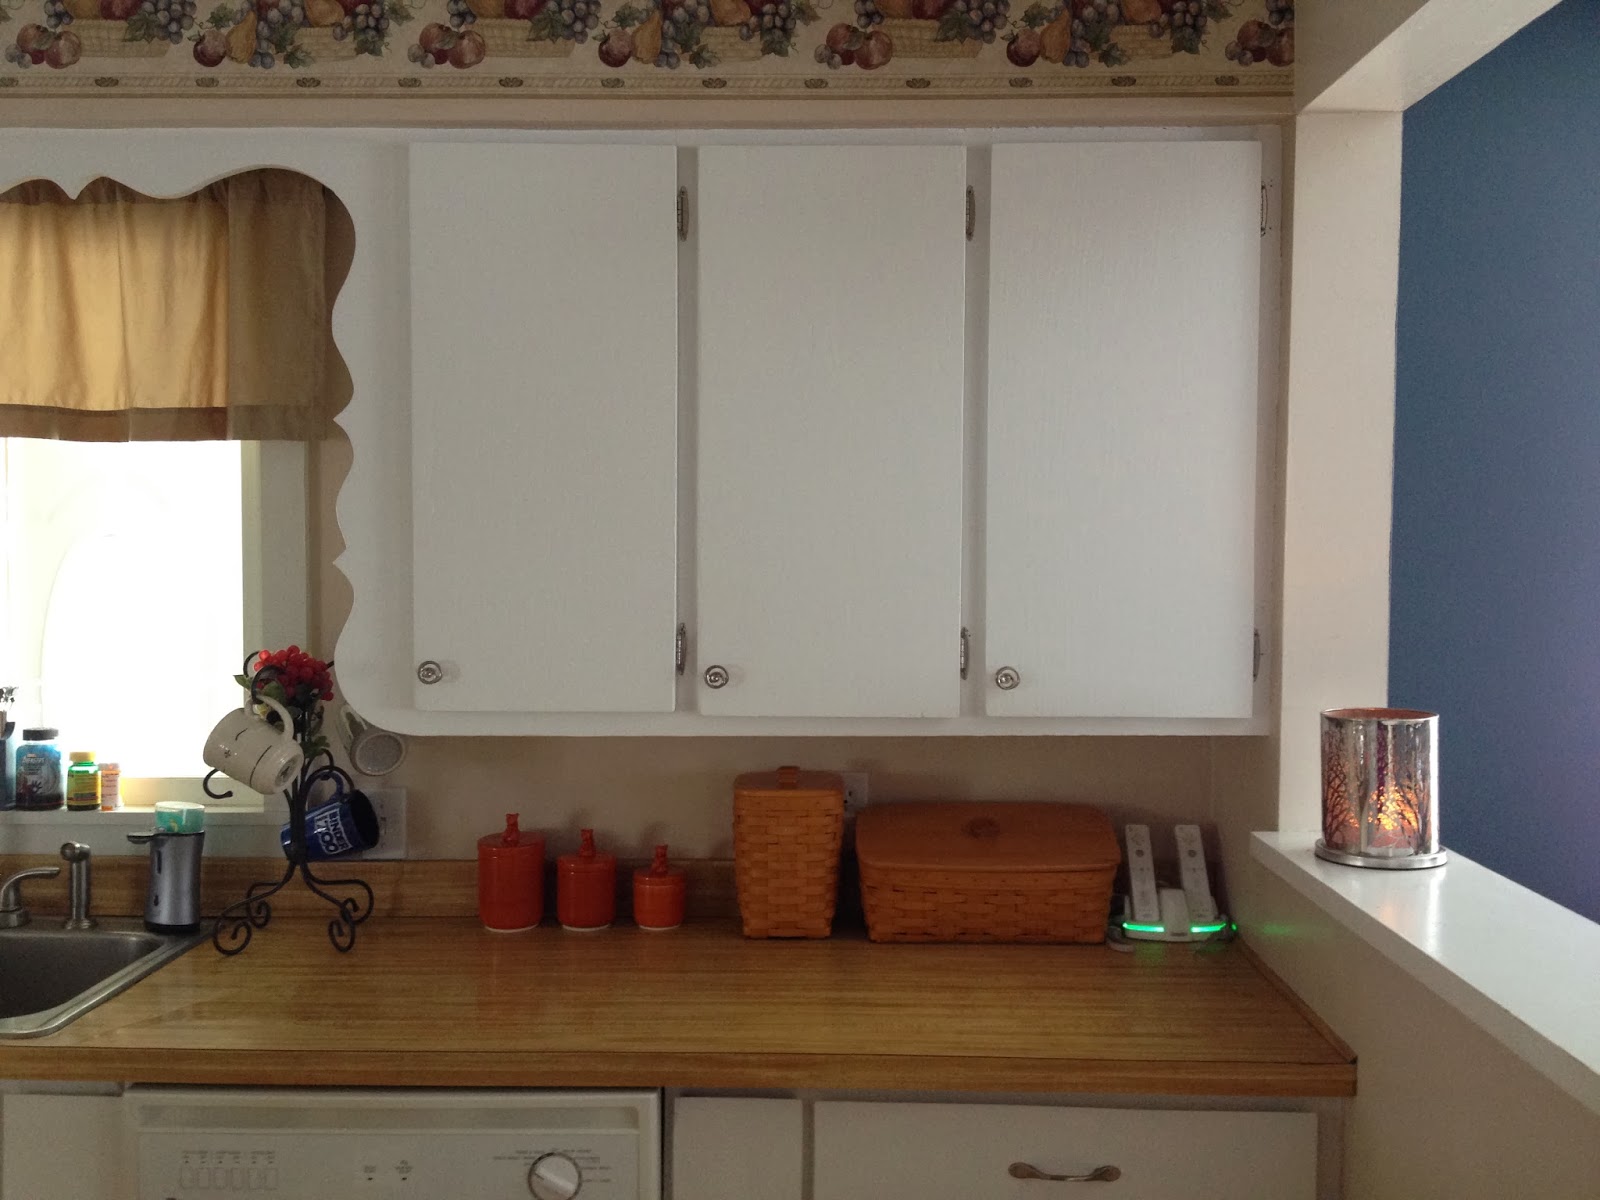
This is one of the most time consuming projects I have ever done.  It might not seem like much to the average person but it took me months of working on it little by little.

We are on a very limited budget, as most are, and couldn't afford to replace the cabinets in our kitchen.  I really didn't want to gut the kitchen out anyway.  Also, the cabinets are really sturdy so it didn't really make much sense to tear them out.  It is a very small kitchen which made it difficult to maneuver around everything while working on it.  I still have some things to do but I can't believe what a difference paint and knobs can make...

Before:
My upper cabinets had so much grime on them from dirty fingers and the paint was wearing off from so much scrubbing.
The same with the lower cabinets.
They were so disgusting!!!
The doors had to be cut down  because they would not close properly.  The previous owners just slapped some wood up to use as doors and painted them.  They didn't close and the didn't match.  The wood was all chipped too.  I tried to fill as many holes as I could but there wasn't much I could do with some of it.   
 As you can see, they were really bad...


After...

The upper cabinets now...
The lower cabinets...
There is still stuff I want to do but until I am able to take a trip to my favorite store (Ikea), it will have to wait.

I plan to replace all of the counter tops with butcher block.  I have already replaced the island top with it and it made such a difference.  Plus, it really isn't that expensive and it is durable.

There are other little things I plan to do too.  I purchased some inexpensive peel and stick tiles from The Home Depot and plan to line the bottom of my cabinets with that.  It will make it look cleaner...


My next project for the kitchen (until I can purchase the butcher block) is to repaint the island.  My brother-in-law built it for their kitchen and when they remodeled they passed it on to me.  I love it but my kids are really making it look grungy.  Plus I want to make it "pop" by painting it a deep red color...

Money Filled Balloons

It's been a couple of busy weeks for this momma.  I enjoyed the time I had with my kids but I am kind of glad that they are back in school now.  The little boogers were really lucky because thanks to the super cold weather their Christmas vacation was extended three extra days.

I hope everyone enjoyed the holidays.  I definitely did.  So did my kids.  I was going to post this one before Christmas but thought I should probably wait because I did not want my son to see it.  Not that he takes the time to look at the stuff I do but I didn't want to take the chance.
The only thing my son requested for Christmas was a PS4 and I definitely was not willing to get him that.  Since I wasn't willing to do that he asked for money to go towards the purchase of one.  Now that I could do...

I am not the kind of person that likes to give money as gifts so I have to be a little creative.  Gift cards are always an option but I think that limits where the shopping can be done, so I decided against that. It was a good decision because almost all the stores were sold out of the PS4.  I looked at 4 different stores before I found one for him.

My gift to my son...

I really made him work for this.  He had to open a large box and a large gift bag and pop 30 balloons to get his gift.  They were the good balloons too so it took a little extra effort to make them pop. lol
It took him longer to open his gifts than anyone else which in my book was great.  Normally he is done and wanting to take his stuff upstairs before everyone else is done opening their gifts.

I think the hardest part of this gift was finding boxes to put the balloons in.  Plus maybe going to the bank to get a bunch of five dollar bills.  I took a few pictures as I was putting it all together.  Not that you couldn't imagine what everything looked like but pictures are nice regardless.


I have a few more posts that I plan to do today so keep checking.  Like I said, I was a busy momma so I have a lot to share.  All it takes is time which is in short supply for me these days.

Thursday, December 19, 2013

Burlap Wreath

This year was full of crafts and home improvement projects for me.  That was actually my New Year's resolution.  I would say I went above and beyond...

Burlap Wreath
This was my first time making one of these.  I think it turned out really nice.  Nice enough to give away as a gift.  I won't say to whom I will be giving it just in case she reads this...

Supplies:
1 roll of burlap
1 wire wreath frame
2 sheets of red felt
3 decorative beads
Thin wire to assemble the flowers

First weave the burlap in and out of the wire frame.  I looked up some tutorials on YouTube until I found the one that I liked the best.  There are tons of them to choose from...
Next I cut 6 pedals for the flowers. Thread the pedals together and pull them tight.  Twist the wire to keep it together.  Once you have that finished, cut a piece of wire and thread the bead.  Stick the threaded bead in the center of the flower and attach the flower to the wreath.

There are different size wreath frames that you can buy.  This is the smaller one.  You may need to use 2 rolls of burlap if you decide to go with the larger frame.

I plan to do a few more posts before Christmas so keep checking...

Gingerbread Cookie Money Gift...

Last year I was trying to be creative and made this gift for my nephew.  He loved it!!!


I do not like giving gift cards because it limits where the gift can be spent.  I also do not like to just give money because that isn't very creative.  This was the perfect solution...
It ended up turning out so good that I posted it on Pinterest.  Since it got a lot of repins I thought I would share it on here too.  Just in time for Christmas...

If my little one will cooperate with me I will be posting a few more Christmas related items.
Time seems to be limited for me these days...

Friday, December 13, 2013

Pallet American Flag

I have so many projects that I have done that I would love to share with everyone but since I have very little time I have to share one at a time.  This is one project that I had wanted to do for a long time but just kept putting it off.  I thought it would have been slightly on the difficult level but was more toward the beginner level.  I did enlist my husband's help to remove the boards from the pallet but it is something that just about anyone can do themselves.  This is how I let him contribute to my projects even if he would rather not. lol

American Flag made from an old pallet...
There are a few things that I would have done differently.  Hind sight is 20/20...
First I would have made the blue section larger with bigger stars.  The other thing I would have done differently was go with a deeper red.  The red I used was more of an apple red.

The picture is pretty much self explanatory but I will give you a step by step to help out a little.
First remove the boards of the pallet and place them on a flat surface and connect them with a 1x4 on the two sides.  Leave a little space between the boards...
Next prime the entire surface (at least the entire front and edges).
Then take a pencil and mark where you want the stripes and the blue section.
I used stickers for the stars that I cut out with my cricut but you can also buy stars, stencil, or free hand them on.  Put the stars on first and then paint the blue area.  I used masking tape to mark the stripes so that they ran fairly straight.  The white area is just the primer.  I did not paint over that...
When you have finished painting the entire thing, take a piece of sandpaper and rough it up a little so that it looks aged.
You will need to seal it with some type of sealant.  I used clear Thompson's Water seal.  It is the one with the red label.
I suppose I should add that to hang it I attached a 1x4 to the top.  I screwed it on both ends to the other 1x4s.  That way you hang it without screwing directly to the house.
I decided to leave it on the house for the winter so we will see how it looks come spring.  Only time will tell...

Wednesday, December 11, 2013

Wreath Ornament

As mentioned in my previous post, I am sharing the wreath ornament that I made for the ornament exchange that I participated in.
I thought it turned out really cute but I am not sure it went over well.  Most all of the ornaments were store bought (which to me wasn't very special).  There were only two or three out of 27 that were homemade.  Though one store bought one I did like (which thankfully I got).  That was a metal star with bells hanging from it...

Wreath Ornament

Supplies:
1 solid round bangle bracelet (or something round and about that size)
Red and White tulle (I used what I had left over from the large wreath that I made.)
3 small red bells

Cut the tulle to the desired length.  Tie double knots around the bracelet.  When you have gone all the way around, take three equal lengths of tulle (2 red and 1 white) and braid them together.  I used a little ribbon to attach the bells to the braid but you could use thin wire or something similar.  I put the braid through the bracelet and tied it together at the end.  The top has a nice little poof at the end where the tulle isn't braided.  Sorry that isn't in the picture.  Sometimes I have a hard time getting just the right view.
These projects are a lot of fun!  I hope this encourages you to make some too.

Tuesday, December 10, 2013

Christmas Wreath

This project was a lot of fun.  It took a few hours but I think the finished product was well worth it.
Red and White Christmas Wreath
Supplies:
2 rolls of red tulle
2 rolls of while tulle
1 14" Styrofoam wreath
2 bells of your choice

The total cost of this project was around $18.00.
$3.00 for each roll of tulle (2.99 x 4)
$5.00 for the Styrofoam wreath
$1.00 for the bells (I bought them at goodwill so the cost will vary depending on where you purchase them.)

I cut the pieces of tulle about 2 feet long.  The number of pieces will vary depending on how full you want it.  I tied each piece on the wreath with a double knot, switching from red to white.  I pushed them close to each other so that it was full looking.  You can adjust the length of the tulle to what you like.  You can also trim it after if you don't like the way it looks.  If you do this, be careful.  If you cut them too short you will have to untie them and replace the pieces.  Once the wreath is as full as you would like it, you can work on the bells.  I used the tulle as the bell holder.  Simply take three lengths of tulle (I used 2 red and 1 white) and tie one end together with a knot.  Then braid the tulle and tie another knot at the finished end.  It really helps if you can get someone to hold the tulle while you are braiding it so that it is nice and tight.  Then, tie the ends together and you are finished.  I was thinking this would look good with some plastic candy canes tied to one side of the wreath instead of the bells but was unable to find any that didn't look too cheap or tacky. 
I made a miniature version of this which I gave away at an ornament exchange.  I thought it was really cute.  I will share that in another post...